Are you ready to take your nails to the next level and express your personal style with incredible nail designs? Look no further! This guide is designed for women who may not be professional nail artists but are eager to create amazing designs right at home.
Get ready to dive into a world of colors, techniques, and creativity as we provide you with easy-to-follow step-by-step instructions and detailed explanations.
Whether you're a beginner or have some experience, this guide will empower you to unleash your creativity and achieve salon-worthy results.
So, grab your favorite nail polishes and let's embark on this exciting journey of self-expression and stunning nail art!
-
- Blended Colors:
Achieve a mesmerizing nail design with blended colors using the following steps:
Step 1: Start with clean and trimmed nails. File and shape them according to your preference.
Step 2: Apply a base coat to protect your nails and create a smooth surface. This step helps the nail polish adhere better and prevents staining.
Step 3: Choose two or more nail polish colors that you love and that complement each other. Select colors from the same color family or experiment with contrasting shades.
Step 4: Apply the lighter shade of polish as the base color on all your nails. Allow it to dry completely.
Step 5: Take a small makeup sponge and cut it into pieces. It's okay if you don't have a specific makeup sponge; you can use a clean kitchen sponge or even a small piece of sponge from a dishwashing sponge.
Step 6: Apply a few drops of each chosen color side by side on the sponge, making sure the colors slightly overlap.
Step 7: Gently dab the sponge onto your nails, starting at the cuticle area and moving towards the tip. Lightly press and lift the sponge to create a blended effect. Repeat this step until you achieve the desired gradient look.
Step 8: If needed, you can repeat Steps 6 and 7 to add more layers of color for a more intense gradient effect.
Step 9: Use a cotton swab dipped in nail polish remover to clean up any excess polish on your skin or cuticles.
Step 10: Finish off with a glossy top coat to seal the design and add a beautiful shine to your nails.- Floral Patterns:
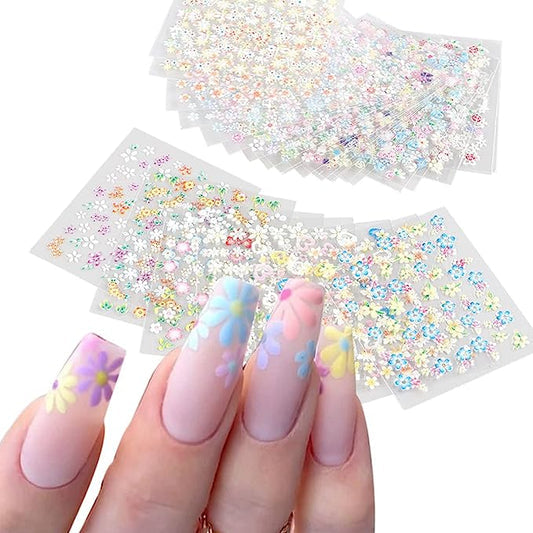
Create elegant floral nail designs using the following steps:
Step 1: Start with clean and trimmed nails. File and shape them according to your preference.
Step 2: Apply a base coat to protect your nails and create a smooth surface. This step also prevents staining from colored polishes.
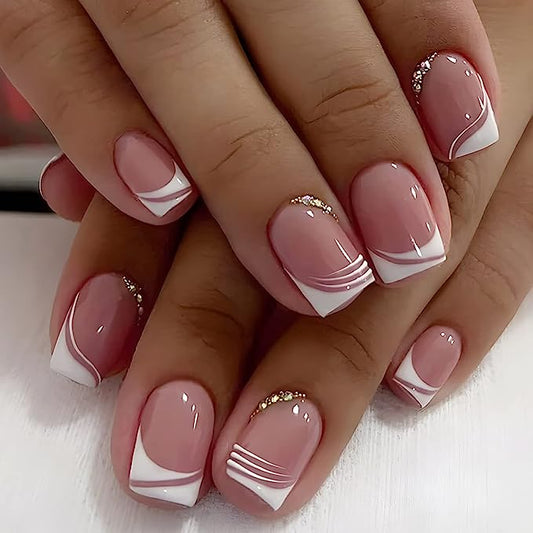
Step 3: Choose a base color that complements the floral design. Light pastel shades, neutral tones, or even a classic French manicure work well as a backdrop for the flowers.
Step 4: Use a thin brush or a dotting tool to create small petal shapes with a contrasting color. Dip the brush or dotting tool into the polish and gently press it onto your nails to create petals. You can make multiple petals to form a flower or create individual flowers across your nails.
Step 5: Add centers to the flowers using a different color and a smaller brush or dotting tool. Create small dots or shapes at the center of each flower to give them a realistic look.
Step 6: Use a green nail polish or a nail art brush to create stems and leaves for your flowers. Paint thin lines or small shapes to represent the stems and add leaves as desired.
Step 7: Add extra details such as small dots or lines to enhance the design further. You can use a toothpick or a fine-tipped brush to create these details.
Step 8: If you make any mistakes or need to clean up the edges, use a brush dipped in nail polish remover to tidy up the design.
Step 9: Apply a glossy top coat to seal the design and protect your nail art. This step gives your nails a beautiful shine and helps the design last longer.- Geometric Lines:
Get creative with geometric lines on your nails using the following steps:
Step 1: Start with clean and trimmed nails. File and shape them according to your preference.
Step 2: Apply a base coat to protect your nails and create a smooth surface. This step helps the nail polish adhere better and prevents staining.
Step 3: Choose a base color that will make the geometric lines stand out. You can go for a classic nude, a bold black, or even a vibrant color that matches your outfit.
Step 4: Use tape or striping tape to create straight lines on your nails. Cut small pieces of tape or striping tape and place them diagonally, horizontally, or vertically on your nails to create different geometric patterns.
Step 5: Select contrasting colors for the geometric lines. You can choose two or more colors, depending on your preference and the complexity of the design you want to achieve.
Step 6: Apply the chosen colors over the exposed areas of your nails, staying within the taped-off sections. You can use a thin brush or a striping brush to create clean and precise lines.
Step 7: Remove the tape while the polish is still slightly wet. This step ensures that the lines are sharp and defined.
Step 8: If you accidentally smudge the design or need to clean up any imperfections, use a fine-tipped brush dipped in nail polish remover to correct any mistakes.
Step 9: Finish off with a glossy top coat to protect your nail art and give it a professional, polished look.- Mirrored Effect:
Achieve a sophisticated mirrored effect on your nails using the following steps:
Step 1: Start with clean and trimmed nails. File and shape them according to your preference.
Step 2: Apply a base coat to protect your nails and create a smooth surface. This step helps the nail polish adhere better and prevents staining.
Step 3: Choose a metallic or chrome nail polish for a reflective finish. You can find a variety of shades, including silver, gold, rose gold, or even holographic colors.
Step 4: Apply the metallic or chrome polish evenly on all your nails, ensuring full coverage. Allow it to dry completely.
Step 5: To achieve the mirrored effect, you have two options: using mirror powder or nail foil. Let's go over both techniques:Option A: Mirror Powder
- Apply a no-wipe gel top coat over the metallic or chrome polish. This gel top coat is specially designed not to leave a sticky residue.
- Use a sponge applicator or a silicone brush to gently rub the mirror powder onto the nails. Rub it in a circular motion until the powder transfers onto the nails and creates a mirrored effect.
- Brush off any excess powder with a soft brush or a clean makeup brush.
- Gently buff the nails with a soft cloth or a buffing block to further enhance the shine and smooth out any imperfections.
- Apply a glossy top coat to seal the design and add a beautiful shine to your nails.
Option B: Nail Foil
- Apply a layer of nail foil adhesive over the metallic or chrome polish. This adhesive is specifically designed for nail foils and ensures a strong bond.
- Allow the adhesive to dry until it becomes tacky. This usually takes a minute or two, depending on the brand and the specific instructions.
- Carefully place the nail foil onto the nails, making sure the shiny side is facing up. Press the foil firmly onto the nails, ensuring good contact between the foil and the adhesive.
- Gently peel off the foil quickly andreveal the mirrored effect on your nails.
- If needed, you can use a clean brush or your fingertip to press down on any areas where the foil didn't transfer completely.
- Seal the design with a top coat to protect the foil and enhance the shine.
Step 6: Clean up any excess polish or foil residue around the edges of your nails using a brush or a cotton swab dipped in nail polish remover. Step 7: Apply a glossy top coat to seal the design and add a beautiful shine to your nails.
- Marbling Effect:
Create a unique marbling effect on your nails with the following steps:
Step 1: Start with clean and trimmed nails. File and shape them according to your preference.
Step 2: Apply a base coat to protect your nails and create a smooth surface. This step helps the nail polish adhere better and prevents staining.
Step 3: Choose two or more nail polish colors that complement each other. You can go for contrasting colors, such as black and white, or create a cohesive look with similar shades.
Step 4: Fill a small bowl with room temperature water. The water level should be deep enough to fully submerge your fingers.
Step 5: Take the first nail polish color and carefully drop a few small droplets onto the water's surface. Repeat this step with the other chosen colors, creating a pattern of droplets on the water.
Step 6: Use a toothpick, a thin brush, or a needle to swirl and manipulate the droplets in the water. Create the marbled effect by dragging the colors together, forming unique patterns. Be creative and experiment with different techniques.
Step 7: Slowly dip one finger at a time into the water, allowing the marbled design to transfer onto your nails. Keep your finger submerged for a few seconds to ensure the polish adheres properly.
Step 8: Clean up any excess polish around your nails using a brush or a cotton swab dipped in nail polish remover.
Step 9: Apply a glossy top coat to seal the design, protect your nail art, and give your nails a beautiful shine.Remember, practice makes perfect! Don't worry if your first attempt doesn't turn out exactly as expected. Nail art is all about creativity and having fun. Embrace the process, try different techniques, and enjoy the beautiful nail designs you create.
#ExpressYourStyle #DIYNailArt #NailArtGuide #CreativeNails #SalonWorthyResults #UnleashYourCreativity #NailDesignInspiration #StepByStepNailArt #NailArtTechniques #SelfExpressionNails #StunningNailDesigns #NailArtJourney